PortSwigger
Lab Description
This lab demonstrates a DOM-based redirection vulnerability that is triggered by web messaging.
Objective: Construct an HTML page on the exploit server that exploits this vulnerability and calls theprint()function.
Step 1: Understanding the Vulnerability
This lab builds on the previous web message vulnerability but adds a flawed validation mechanism.
The vulnerability chain:
- Page has an event listener waiting for web messages
- Listener checks if the message contains
"http:"or"https:"usingindexOf() - If found, the message is assigned to
location.href(causing a redirect) - The
indexOf()check is flawed — it only checks if the substring exists anywhere, not if it’s at the beginning
The bypass:
- Use a
javascript:URL as the payload - Append
//http:at the end to satisfy theindexOf()check - The browser executes the
javascript:URL instead of treating it as an HTTP redirect
Step 2: Reconnaissance
- Open the lab homepage
- Open Browser Developer Tools → View Page Source or Sources tab
- Look for the vulnerable event listener:
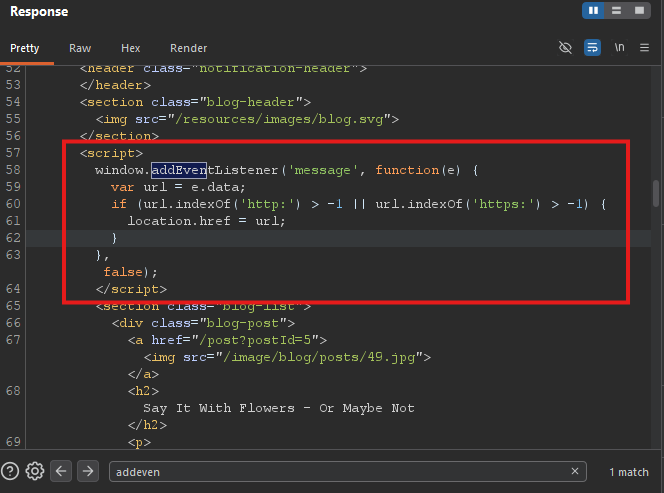
What the developer intended:
- Only allow URLs that start with
http:orhttps: - Redirect the page to that URL
What actually happens:
- The check only ensures
"http:"or"https:"appears somewhere in the string - It does NOT verify they are at the beginning
Step 3: Crafting the Bypass Payload
Goal: Call print() using a javascript: URL while passing the indexOf() check.
Standard JavaScript URL:
javascript:print()
Problem: This doesn’t contain "http:" or "https:", so the check fails.
Bypass payload:
javascript:print()//http:
Why this works:
| Part | Purpose |
|---|---|
javascript:print() | The actual payload — executes print() |
// | JavaScript comment — everything after is ignored |
http: | Satisfies the indexOf() check |
How the validation sees it:
url.indexOf('http:')finds"http:"at the end- The condition passes, so
location.href = urlexecutes - The browser sees
javascript:print()and executes it
Step 4: Building the Exploit Page
- Go to the Exploit server (provided in the lab)
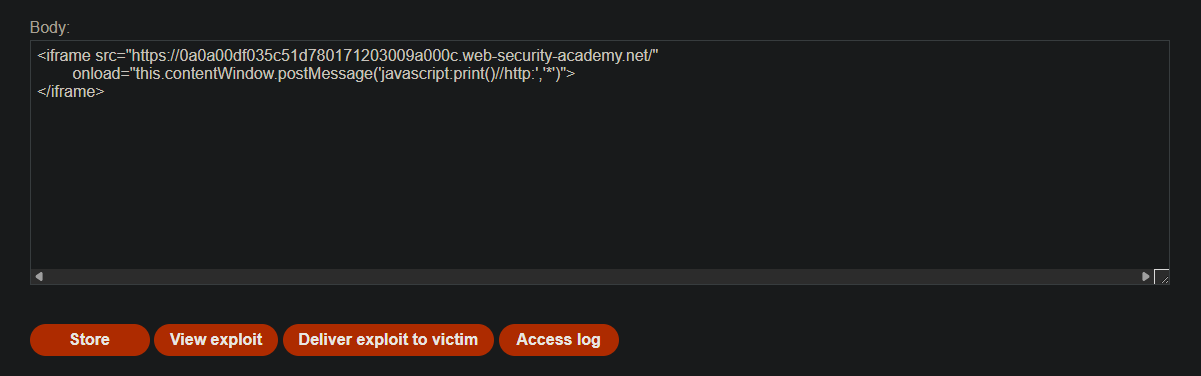
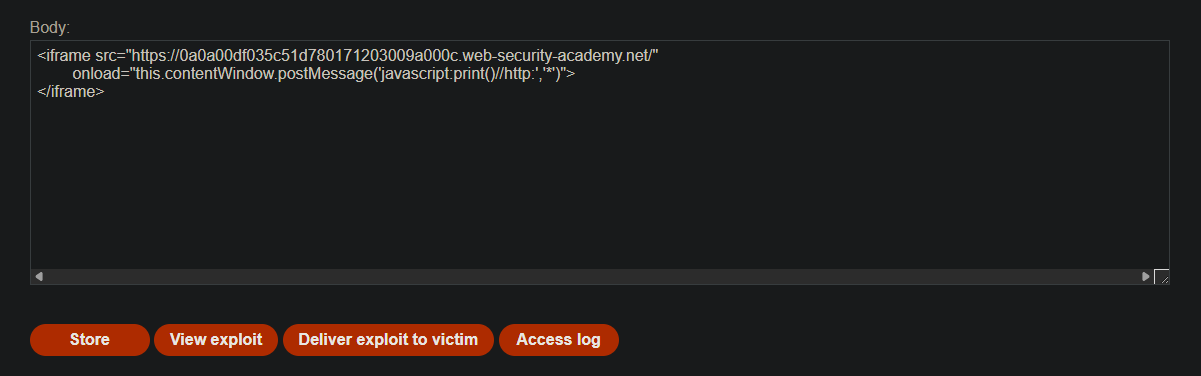
- In the Body section, paste the following HTML:
<iframe src="https://YOUR-LAB-ID.web-security-academy.net/"
        onload="this.contentWindow.postMessage('javascript:print()//http:','*')">
</iframe>
- Replace
YOUR-LAB-IDwith your actual lab ID
Step 5: Understanding the Exploit
Code Breakdown:
<iframe src="https://YOUR-LAB-ID.web-security-academy.net/"
Loads the vulnerable target page inside the iframe.
onload="this.contentWindow.postMessage('javascript:print()//http:','*')"
When the iframe loads, send a web message with:
- Data:
javascript:print()//http: - Target origin:
'*'(send to any origin)
What happens on the target page:
1. Event listener receives message: "javascript:print()//http:"
                ↓
2. indexOf('http:') finds "http:" at position ~19
                ↓
3. Condition passes → location.href = "javascript:print()//http:"
                ↓
4. Browser executes javascript:print()
                ↓
5. print() function is called
Step 6: Testing the Exploit
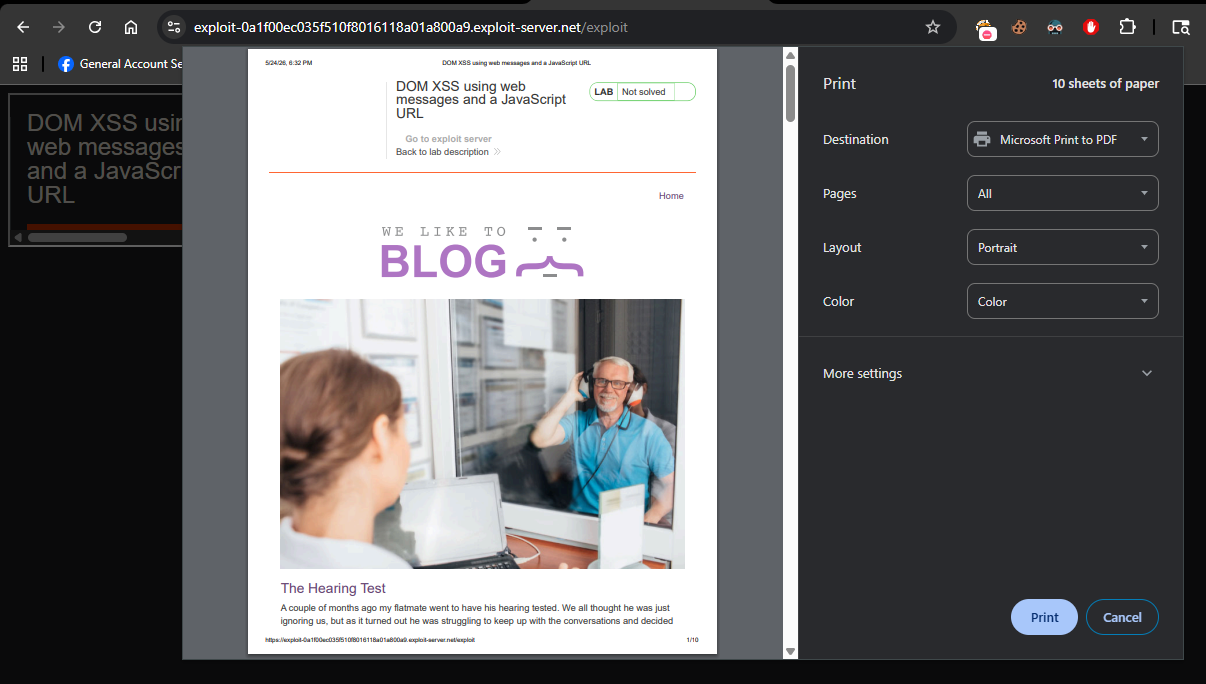
- Click View exploit (simulates visiting your malicious page)
- Observe that the
print()dialog appears
Success indicator: Your browser’s print dialog pops up.
Step 7: Delivering to the Victim
- Click Store to save the exploit
- Click Deliver exploit to victim
- The lab solves when the victim’s browser executes the payload
Step 8: Lab Solved
Success message displayed:
